sabato 30 dicembre 2017

provare la demo di google

andare sul tutorial per pyton

Usage with Python API

classify_image.py downloads the trained model from tensorflow.org when the program is run for the first time. You'll need about 200M of free space available on your hard disk.
Start by cloning the TensorFlow models repo from GitHub. Run the following commands:
cd models/tutorials/image/imagenet python classify_image.py
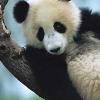
The above command will classify a supplied image of a panda bear.
If the model runs correctly, the script will produce the following output:
giant panda, panda, panda bear, coon bear, Ailuropoda melanoleuca (score = 0.88493) indri, indris, Indri indri, Indri brevicaudatus (score = 0.00878) lesser panda, red panda, panda, bear cat, cat bear, Ailurus fulgens (score = 0.00317) custard apple (score = 0.00149) earthstar (score = 0.00127)
If you wish to supply other JPEG images, you may do so by editing the --image_file argument.
If you download the model data to a different directory, you will need to point --model_dir to the directory used.


installare Anaconda

da Medium

This tutorial is split into three sections. The first part is installing Anaconda. The second part is testing your installation (making sure conda works, dealing with path issues etc). Finally, the last part of the tutorial goes over installing packages, and environment management. As always, feel free to ask questions either here or on the youtube video page.
  1. Download and install Anaconda (windows version) from
Choose either the Python 2 or Python 3 Version depending on your needs. It doesn’t effect the installation process.
2.Select the default options when prompted during the installation of Anaconda.
Note: If you checked this box, steps 4 and 5are not needed. The reason why it isn’t preselected is a lot of people don’t have administrative rights on their computers.
Add Anaconda to PATH Environmental Variable
3. After you finished installing, open Anaconda Prompt. Type the command below to see that you can use a Jupyter (IPython) Notebook.
jupyter notebook
If you want a basic tutorial going over how to open Jupyter and using python, please see the video below.
Jupyter Notebook Tutorial
4. If you didn’t check the add Anaconda to path argument during the installation process, you will have to add python and conda to your environment variables. You know you need to do so if you open a command prompt (not anaconda prompt) and get the following messages
Messages like this mean you havent added python or conda to your path yet. In the next step, we will fix this
5. You can add Python and Conda to your path by using the setx command in your command prompt.
Added Conda and Python to my Environment Variables.
If you don’t know where your conda and/or python is, you type the following commands into your anaconda prompt
You can also manually modify your environment variables.
6. Close the current command prompt and open a new one. Try typing python and conda in your command prompt to see if the paths are saved. Done!

Further Steps (Optional)

  1. If you want to use PyCharm (a python IDE), please see this tutorial on Integrating Anaconda with PyCharm.
2. If you want to use both python 2 and 3, please see the following tutorial on Environment Management with Conda.
3. I recommend the following tutorial if you plan to Install Git on Windows. It will also give you access to some unix tools like lscatpwdnano, and ssh on your command prompt.
4. Since so many of you have asked about machine learning, please see this tutorial on Making your First Machine Learning Classifier in Scikit-learn (Python)
Please let me know if you have any questions! You can either leave a comment here or in the comments section of youtube.